Wednesday, August 23, 2023

Humic acids are complex organic compounds that are found in soil, water, and various organic materials like compost and peat. They are a key component of humus, the organic component of soil that contributes to its fertility and structure. Humic acids offer a range of chemical, physical, and biological benefits in various contexts, including agriculture, environmental remediation, and even potential medical applications. Here are some of the benefits:

1. Chemical Benefits:

  • Chelation: Humic acids can form complexes with metal ions, a process known as chelation. This can help in making essential micronutrients more available to plants, promoting their growth and overall health.

  • Cation Exchange Capacity (CEC): Humic acids have a high cation exchange capacity, which means they can attract and hold onto positively charged ions (cations) such as calcium, magnesium, and potassium. This increases the nutrient-holding capacity of soil, making nutrients available to plants for a longer period.

  • Buffering: Humic acids act as natural buffers, helping to maintain the pH of soil within an optimal range for plant growth. This is crucial because soil pH affects nutrient availability to plants.


2. Physical Benefits:

  • Soil Structure Improvement: Humic acids contribute to the aggregation of soil particles, enhancing soil structure. This improves water infiltration, water-holding capacity, and aeration, which collectively promote root growth and plant development.

  • Erosion Prevention: Soil treated with humic acids is less prone to erosion, as the improved soil structure helps hold the soil particles together and reduce runoff.

  • Water Retention: Humic acids enhance the soil's water-holding capacity by increasing its ability to retain moisture. This is particularly valuable in arid and semi-arid regions where water availability is limited.

3. Biological Benefits:

  • Microbial Activity: Humic acids serve as a food source and habitat for beneficial microorganisms in the soil. These microorganisms contribute to nutrient cycling, disease suppression, and overall soil health.

  • Plant Growth Promotion: Humic acids stimulate root growth, increase nutrient uptake, and enhance the efficiency of photosynthesis. This results in improved plant growth, higher yields, and better crop quality.


  • Stress Tolerance: Plants treated with humic acids are often more resilient to various stressors such as drought, heat, and disease. Humic acids can help activate stress-response mechanisms in plants, enabling them to cope better with adverse conditions.

  • Toxin Degradation: Humic acids can interact with and help to degrade certain pollutants and toxins in soil and water, making them potentially useful in environmental remediation efforts.

It's important to note that while humic acids offer numerous benefits, their effectiveness can vary based on factors such as soil type, application method, concentration, and the specific context in which they are used. Researchers continue to study and explore the potential applications of humic acids in various fields to harness their benefits more effectively.

Enriching Growth: 6 Potent Homemade Rooting Hormone Recipes

Introduction:


Embarking on the journey of nurturing plants is akin to cultivating dreams. Every gardener or plant enthusiast knows the thrill of watching a cutting develop roots and flourish into a thriving plant. To enhance this process, rooting hormones play a pivotal role. While commercial options are available, crafting your own homemade rooting hormone offers a personalized touch and a sustainable approach. In this guide, we unveil six powerful and cost-effective recipes, along with their ingredients, concentrations, and benefits, to help your cuttings flourish with vitality.


1. Cinnamon Elixir:


Ingredients:


1 tablespoon ground cinnamon.

1 cup water.


Concentration and Application:


Boil the water and stir in the cinnamon. Let it cool and strain. Apply to cuttings by dipping or spraying.


Benefits:


Cinnamon possesses natural antifungal properties that help protect delicate cuttings from diseases while stimulating root growth.


2. Aloe Vera Solution:


Ingredients:


2 tablespoons aloe vera gel.

1 cup water.


Concentration and Application:


Mix the aloe vera gel with water thoroughly. Use it to soak the base of the cuttings before planting.


Benefits:


Aloe vera contains enzymes and hormones that foster root development, alongside its moisturizing and protective qualities.


3. Honey Blend:


Ingredients:


1 tablespoon honey.

2 cups water.


Concentration and Application:


Dissolve honey in water, ensuring it's well-mixed. Dip the cuttings in the solution before planting.


Benefits:


Honey's natural sugars provide energy for rooting while its antibacterial properties aid in preventing infections.


4. Willows' Wisdom:


Ingredients:


1 cup willow branches (with leaves).

3 cups water.


Concentration and Application:


Chop willow branches, boil them in water, and let the mixture steep overnight. Strain before use.


Benefits:


Willow branches contain indolebutyric acid, a natural rooting hormone, which encourages rapid root development.


5. Aspirin Elation:


Ingredients:


1 aspirin tablet (uncoated).

1 gallon water.


Concentration and Application:


Crush the aspirin tablet and dissolve it in water. Use it for watering the plants.


Benefits:


Aspirin contains salicylic acid that promotes root growth, enhances plant immunity, and aids in stress recovery.


6. Cinnamon Honey Fusion:


Ingredients:


1 tablespoon honey.

1 tablespoon ground cinnamon.

1 cup water.


Concentration and Application:


Mix honey and cinnamon in water, ensuring even distribution. Use as a soak or spray for cuttings.


Benefits:


This blend combines the benefits of both cinnamon and honey, offering a well-rounded solution for rooting stimulation and protection.


Conclusion:


Empower your gardening journey with these remarkable homemade rooting hormone recipes. As you delve into the world of natural ingredients, you'll not only witness the magic of root development but also contribute to a more sustainable and harmonious relationship with your plants. Experiment, adapt, and watch as your cuttings flourish into thriving new life.


Friday, July 30, 2021

The most richest sources of potassium for your plants.

Potassium, one of the 3 major sources of nutrients for plants, need not be supplied only through inorganic fertilizers. There are various organic sources of potassium that can benefit the plants in your garden hugely. Potassium, which is one of the most important nutrients for overall plant health, is available in abundance through various organic sources.

Richest source of potassium for plants


Let’s move directly to the list of various organic sources of potassium that can serve as the richest sources of potassium for your plants. 


Here is also a video on the richest sources of nitrogen for your plants.  


Richest sources of Potassium for your plants: 

Number 1. Cucumber skins (burned): Cucumber skins are one of the fastest-releasing sources of potassium and contain 27% of potassium. 

Number 2. Crab waste: Making compost with crab waste and crab shell by mixing it with leaves, and other kitchen waste, and leaving it for months, will serve as a rich source of potassium and nitrogen for your plants. 

Number 3. Granite dust: The most effective but slow release source of potassium is granite dust. Since it is a natural rock it is a slow release source and is not a quick fix. Granite dust will be easily available in granite quarries and is inexpensive. 

Number 4. Greensand: Greensand which is available in ancient sea beds is a rich source of a handful of nutrients and also supplies a good amount of potassium to your plants. Greensand is also available in various gardening supply stores. This releases potassium at a medium rate. 

Number 5. Kelp: Kelp is a good quick-release form of potassium for your plants and is easily available in both liquid and solid forms. Kelp along with seaweed is a highly effective source of potassium for your plants. 

Number 6. Clay: Kaolinite (Clay) is also one of the effective sources of potassium. Mixing some clay soil into your garden bed will help your plants widely. 

Number 7. Wood ashes: Wood ash is one of the most easily available, natural sources of potash to your plants in the garden. Directly adding hardwood ash to your plants will serve as a rich source of potassium for the plants. 

Number 8. Sulpomag: Sulpomag is a mined rock that is used commonly as a source of potassium for plants. Sulpomag is a combination of potassium, magnesium, and sulphur, so this needs to be used only when magnesium and sulphur are also required for your plants. Sulpomag can be used during the growing stage of your plants. 

These 8 sources of potassium are natural sources that can be used for your organic garden. 


Tuesday, June 22, 2021

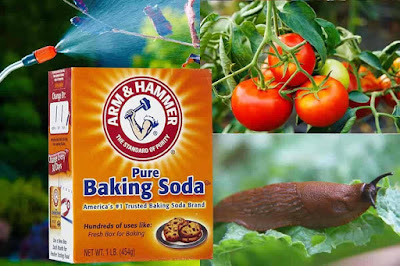
Baking Soda (Sodium Bicarbonate) and its 10 highly effective uses for plants and garden - Protips included.

Baking soda, the commonly available kitchen ingredient can be used for your plants and garden in multiple of ways due to its immense benefits. We will directly move onto the benefits of using baking soda or sodium bicarbonate for your plants and garden. 

We will just see what are the things that are required to use baking soda effectively in the garden. 

Uses of baking soda for palnts and garden


The supplies required are:
1. Baking soda (that is commonly used in the kitchen)
2. liquid soap
3. Water
4. Flour
5. Ammonia
6. Epsom salt
7. Biodegradable soap

The tools required are: 
1. Watering can
2. Sprayer
3. Mixing bowl

15 Highly effective uses of baking soda for plants and garden:

1. Baking soda is highly effective in killing cabbage worms that destroy the foliage of brassica varieties. 

How to use baking soda to kill cabbage worms?

Just mix equal quantities of flour and baking soda and sprinkle the mixture on the leaves. The worms will eat it and soon will die. 

2. Baking soda is also used to enhance the taste of tomatoes, mostly when grown in acidic soil. 

How to use baking soda to grow sweeter tomatoes?

Slightly dig around the base of the tomato plant and add the baking soda directly to the soil. Mix it well along with the soil and this will lower the acidity level of the soil thus giving rise to sweeter tomatoes rather than the tart-tasting ones. 

3. Baking soda or sodium bicarbonate is also used to make your plants bloom. It enhances the blooms in your flowering plants and vegetable plants. 

How to use baking soda to enhance the blooms in the plants?

1 table spoon of baking soda in 2 quarts of water when sprayed on the plants will encourage blooming. 

4. Baking soda will make your dull looking plants become lush green. 

How to use sodium bicarbonate to grow lush green plants?

A mixture of 1 spoon baking soda, 1/2 spoon of ammonia and 1 spoon epsom salt in 1 gallon of water will help to boost your plants. This fertilizer will turn your dull looking plants into lush green one. 

5. Baking soda is also highly effective in preventing fungal diseases and mildew. 

Why baking soda prevents fungal diseases?

Baking soda makes the surface less acidic and hence prevents the fungal spores from multiplying and growing. 

Protip 1: This preventive treatment of baking soda can be used in your vegetable garden, fruit plants, flowering plants, trees, bushes, vines and any kind of plants in your garden. 

How to use baking soda to prevent fungal diseases?

Mix 1 teaspoon of baking soda in 1 litre of water and also add few drops of liquid soap to the solution. Mix it thoroughly and spray it on the plants. 

Protip 2: Do not use this only on infected plants. It can be used on a regular basis for all your plants, as this prevents the formation of fungal spores. 

6. Baking soda is used as an effective insect repellant in the garden.

How to use baking soda as insect repellant in the garden?

Make a paste of 1 teaspoon baking soda in 1/3 cup of oil (mostly mustard oil or olive oil is preferred) and then dilute it in 1 litre of water. Spray this solution on the plants and soil. 

Protip 3: Use this mixture once a month and it is highly effective in repelling aphids, spider mites and scales. 

7. Get rid of gnats with the help of baking soda.

How to kill gnats using baking soda? 

Gnats which are most common in your compost bin or in the pile of leaves are a great nuisance and these can be prevented by using 2 teaspoon baking soda in 1 litre of water along with biodegradable soap. Mix all these three and spray them on the infected area. 

8. Insects like roaches and silverfish that dwell under the soil can be easily dissipated using baking soda. 

How to get rid of insects under the soil?

Take a handful of baking soda and sprinkle it on the area where you commonly find these insects buried under the soil. This will deteriorate the insects slowly until they disappear completely. 

9. Baking soda is one of the useful soil testing kits that can be used to test the pH of your garden soil, free of cost. 

How to use baking soda to test the pH of the soil?

The pH of the soil can be tested by taking the garden soil mixing it in water to make a clay or mud form. Then sprinkle some baking soda in the soil. If the soil bubbles, then it is acidic. 

Protip 4: Always take the garden soil from about 6 inches deep from the ground level for testing the pH.

Protip 5: If the soil doesn't bubble upon adding baking soda, it doesn't mean that soil is alkaline in nature. It can be either alkaline or neutral. To test it further just use the same process of mixing garden soil in water until it forms mud and then add a tablespoon of vinegar. If the soil is alkaline in nature, there will be bubble formation, upon the addition of vinegar. If the soil is neutral, the soil will not bubble for the addition of both baking soda and vinegar. 

10. Get rid of ants in your garden with the help of baking soda. 

How to use baking soda to get rid of ants in the garden?

Ants which are the most common nuisances in the garden can be get rid of by adding 2 to 3 spoon of baking soda in 1 litre of water and pouring it in the soil where you find the anthills. 


Sunday, June 20, 2021

How to propagate plants? Step by step process with protips.


Propagating plants at home from the mother plant is highly useful to make more genetically identical plants that resemble the parent and is free of cost. When it comes to the propagation of plants, there are various methods through which a plant can be propagated. Here is the list of plant propagation methods. 


Take a glance till the end, as there are lots of pro tips hidden in between.


Plant propagation from cuttings - How to propagate plants from cuttings is one of the biggest questions that pops up when we think of propagation techniques. Propagation from cuttings is the most common method of propagation. This method is also easy for non-hardy plants as they root more quickly when compared to hardy plants. When we consider the propagation of plants from cuttings, there are 2 common methods - Leaf cuttings and stem cuttings. 


How to make the right stem cutting?

  1. The first step is to choose the right stem that is to be used as a cutting from the mother.

  2. Once the stem that is to be used as a cutting is chosen, take a sharp gardening scissor and cut the stem at 45 degrees. 

  3. The cutting must be made below the node, which is nothing but the area where the leaf meets the stem. This node is the main region from which the roots will appear. 


Here is the first protip: Once you cut the stem at 45 degrees below the node, the most important step that will not be shared by most gardeners is to make a slice through the middle of the node. Just place the cutting on a hard surface and make a slice through the middle of the node. Be careful not to cut the stem fully. This will stimulate the production of rooting hormone and the stem will begin to root quickly and easily. 


Protip 2: Whenever you try to propagate a plant from its stem cuttings, remember to remove most of the leaves on the cutting and leave just 2 to 3 leaves. Be careful not to pluck away all the leaves, as this will deprive the cutting of making food through photosynthesis. At the same time, many leaves in the cutting will take away most of the nutrients and hinder root formation. 


List of plants that can be grown or propagated from stem cuttings: Plants such as 

  • African Violet 

  • Acalypha 

  • Aglaonema 

  • Begonia 

  • Beloperone

  • Brassaia actinophylla 

  • Christmas cactus 

  • Horseradish

  • Hydrangea

  • Lavender

  • Fuschia

  • Oregano


The list of vegetable plants that can be grown through stem cuttings are: 

  • Tomatoes

  • Cucumber

  • Zucchini

  • Bittermelon

  • Brinjals

  • Pointed Guard

  • Peppers


List of garden equipment or gardening tools that you will need:


  • Gardening scissor or Razor blade

  • Alcohol for sterilizing gardening equipment

  • Cutting from the parent plant

  • Soilless potting mix

  • Plastic bag

  • Containers for planting

  • Stick to make a hole for planting the cutting


Steps to follow for a successful plant propagation through stem cutting: 


  1. Remember not to choose cuttings with lots of flowers and leaves: The presence of a lot of flowers and leaves will hinder the ability of the cutting to form roots. Also do not choose cuttings from plants with a lot of drooping leaves or dying leaves. 

  2. Prepare the pot with the soilless mix: Take a clean sterilized pot and fill it with the soilless mix.  The reason we choose a soilless potting mix is that it drains well. 


Protip 3: Avoid using garden soil for propagating cuttings as the pathogens in the garden soil might kill the cutting before it begins to root and hence, the cutting might rot. 


propagation of plants

Protip 4: When trying to root the cutting, mostly we tend to root in in water medium, but when we transplant the cuttings to the soil, most of it will not survive. So it is highly recommended to root the cuttings directly in a soilless mix and then repot it in soil. 


  1. Use a sterilized pair of gardening scissors or razor blade to make the cutting from the parent plant. A cutting of 4 to 6 inches long is highly recommended. 

  2. Remember to slice at the node: As discussed earlier, make a thin slice in the mid of the node, to enhance the rooting process from this spot. 

  3. Bore a hole for planting the cutting: With the help of a stick bore a hole that is half to 1 inch deep and plant the cutting in it.


Protip 5: When planting the cutting place it at 45 degrees, instead of planting it straight. This will enhance the rooting process.


  1. Cover the pot with the cutting in a plastic bag: Once the cutting is planted in a soilless potting mix, cover the pot with a plastic bag so that the moisture will be retained for a longer period of time and the heat will also be held in. These conditions will help in rooting.

  1. Once the plant has rooted and given out some new leaves, you can place the pot in direct sunlight. 


Related Posts