Tuesday, June 22, 2021

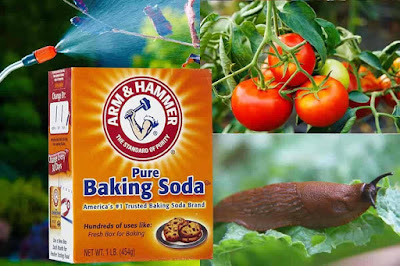
Baking Soda (Sodium Bicarbonate) and its 10 highly effective uses for plants and garden - Protips included.

Baking soda, the commonly available kitchen ingredient can be used for your plants and garden in multiple of ways due to its immense benefits. We will directly move onto the benefits of using baking soda or sodium bicarbonate for your plants and garden. 

We will just see what are the things that are required to use baking soda effectively in the garden. 

Uses of baking soda for palnts and garden


The supplies required are:
1. Baking soda (that is commonly used in the kitchen)
2. liquid soap
3. Water
4. Flour
5. Ammonia
6. Epsom salt
7. Biodegradable soap

The tools required are: 
1. Watering can
2. Sprayer
3. Mixing bowl

15 Highly effective uses of baking soda for plants and garden:

1. Baking soda is highly effective in killing cabbage worms that destroy the foliage of brassica varieties. 

How to use baking soda to kill cabbage worms?

Just mix equal quantities of flour and baking soda and sprinkle the mixture on the leaves. The worms will eat it and soon will die. 

2. Baking soda is also used to enhance the taste of tomatoes, mostly when grown in acidic soil. 

How to use baking soda to grow sweeter tomatoes?

Slightly dig around the base of the tomato plant and add the baking soda directly to the soil. Mix it well along with the soil and this will lower the acidity level of the soil thus giving rise to sweeter tomatoes rather than the tart-tasting ones. 

3. Baking soda or sodium bicarbonate is also used to make your plants bloom. It enhances the blooms in your flowering plants and vegetable plants. 

How to use baking soda to enhance the blooms in the plants?

1 table spoon of baking soda in 2 quarts of water when sprayed on the plants will encourage blooming. 

4. Baking soda will make your dull looking plants become lush green. 

How to use sodium bicarbonate to grow lush green plants?

A mixture of 1 spoon baking soda, 1/2 spoon of ammonia and 1 spoon epsom salt in 1 gallon of water will help to boost your plants. This fertilizer will turn your dull looking plants into lush green one. 

5. Baking soda is also highly effective in preventing fungal diseases and mildew. 

Why baking soda prevents fungal diseases?

Baking soda makes the surface less acidic and hence prevents the fungal spores from multiplying and growing. 

Protip 1: This preventive treatment of baking soda can be used in your vegetable garden, fruit plants, flowering plants, trees, bushes, vines and any kind of plants in your garden. 

How to use baking soda to prevent fungal diseases?

Mix 1 teaspoon of baking soda in 1 litre of water and also add few drops of liquid soap to the solution. Mix it thoroughly and spray it on the plants. 

Protip 2: Do not use this only on infected plants. It can be used on a regular basis for all your plants, as this prevents the formation of fungal spores. 

6. Baking soda is used as an effective insect repellant in the garden.

How to use baking soda as insect repellant in the garden?

Make a paste of 1 teaspoon baking soda in 1/3 cup of oil (mostly mustard oil or olive oil is preferred) and then dilute it in 1 litre of water. Spray this solution on the plants and soil. 

Protip 3: Use this mixture once a month and it is highly effective in repelling aphids, spider mites and scales. 

7. Get rid of gnats with the help of baking soda.

How to kill gnats using baking soda? 

Gnats which are most common in your compost bin or in the pile of leaves are a great nuisance and these can be prevented by using 2 teaspoon baking soda in 1 litre of water along with biodegradable soap. Mix all these three and spray them on the infected area. 

8. Insects like roaches and silverfish that dwell under the soil can be easily dissipated using baking soda. 

How to get rid of insects under the soil?

Take a handful of baking soda and sprinkle it on the area where you commonly find these insects buried under the soil. This will deteriorate the insects slowly until they disappear completely. 

9. Baking soda is one of the useful soil testing kits that can be used to test the pH of your garden soil, free of cost. 

How to use baking soda to test the pH of the soil?

The pH of the soil can be tested by taking the garden soil mixing it in water to make a clay or mud form. Then sprinkle some baking soda in the soil. If the soil bubbles, then it is acidic. 

Protip 4: Always take the garden soil from about 6 inches deep from the ground level for testing the pH.

Protip 5: If the soil doesn't bubble upon adding baking soda, it doesn't mean that soil is alkaline in nature. It can be either alkaline or neutral. To test it further just use the same process of mixing garden soil in water until it forms mud and then add a tablespoon of vinegar. If the soil is alkaline in nature, there will be bubble formation, upon the addition of vinegar. If the soil is neutral, the soil will not bubble for the addition of both baking soda and vinegar. 

10. Get rid of ants in your garden with the help of baking soda. 

How to use baking soda to get rid of ants in the garden?

Ants which are the most common nuisances in the garden can be get rid of by adding 2 to 3 spoon of baking soda in 1 litre of water and pouring it in the soil where you find the anthills. 

Sunday, June 20, 2021

How to propagate plants? Step by step process with protips.


Propagating plants at home from the mother plant is highly useful to make more genetically identical plants that resemble the parent and is free of cost. When it comes to the propagation of plants, there are various methods through which a plant can be propagated. Here is the list of plant propagation methods. 


Take a glance till the end, as there are lots of pro tips hidden in between.


Plant propagation from cuttings - How to propagate plants from cuttings is one of the biggest questions that pops up when we think of propagation techniques. Propagation from cuttings is the most common method of propagation. This method is also easy for non-hardy plants as they root more quickly when compared to hardy plants. When we consider the propagation of plants from cuttings, there are 2 common methods - Leaf cuttings and stem cuttings. 


How to make the right stem cutting?

  1. The first step is to choose the right stem that is to be used as a cutting from the mother.

  2. Once the stem that is to be used as a cutting is chosen, take a sharp gardening scissor and cut the stem at 45 degrees. 

  3. The cutting must be made below the node, which is nothing but the area where the leaf meets the stem. This node is the main region from which the roots will appear. 


Here is the first protip: Once you cut the stem at 45 degrees below the node, the most important step that will not be shared by most gardeners is to make a slice through the middle of the node. Just place the cutting on a hard surface and make a slice through the middle of the node. Be careful not to cut the stem fully. This will stimulate the production of rooting hormone and the stem will begin to root quickly and easily. 


Protip 2: Whenever you try to propagate a plant from its stem cuttings, remember to remove most of the leaves on the cutting and leave just 2 to 3 leaves. Be careful not to pluck away all the leaves, as this will deprive the cutting of making food through photosynthesis. At the same time, many leaves in the cutting will take away most of the nutrients and hinder root formation. 


List of plants that can be grown or propagated from stem cuttings: Plants such as 

  • African Violet 

  • Acalypha 

  • Aglaonema 

  • Begonia 

  • Beloperone

  • Brassaia actinophylla 

  • Christmas cactus 

  • Horseradish

  • Hydrangea

  • Lavender

  • Fuschia

  • Oregano


The list of vegetable plants that can be grown through stem cuttings are: 

  • Tomatoes

  • Cucumber

  • Zucchini

  • Bittermelon

  • Brinjals

  • Pointed Guard

  • Peppers


List of garden equipment or gardening tools that you will need:


  • Gardening scissor or Razor blade

  • Alcohol for sterilizing gardening equipment

  • Cutting from the parent plant

  • Soilless potting mix

  • Plastic bag

  • Containers for planting

  • Stick to make a hole for planting the cutting


Steps to follow for a successful plant propagation through stem cutting: 


  1. Remember not to choose cuttings with lots of flowers and leaves: The presence of a lot of flowers and leaves will hinder the ability of the cutting to form roots. Also do not choose cuttings from plants with a lot of drooping leaves or dying leaves. 

  2. Prepare the pot with the soilless mix: Take a clean sterilized pot and fill it with the soilless mix.  The reason we choose a soilless potting mix is that it drains well. 


Protip 3: Avoid using garden soil for propagating cuttings as the pathogens in the garden soil might kill the cutting before it begins to root and hence, the cutting might rot. 


propagation of plants

Protip 4: When trying to root the cutting, mostly we tend to root in in water medium, but when we transplant the cuttings to the soil, most of it will not survive. So it is highly recommended to root the cuttings directly in a soilless mix and then repot it in soil. 


  1. Use a sterilized pair of gardening scissors or razor blade to make the cutting from the parent plant. A cutting of 4 to 6 inches long is highly recommended. 

  2. Remember to slice at the node: As discussed earlier, make a thin slice in the mid of the node, to enhance the rooting process from this spot. 

  3. Bore a hole for planting the cutting: With the help of a stick bore a hole that is half to 1 inch deep and plant the cutting in it.


Protip 5: When planting the cutting place it at 45 degrees, instead of planting it straight. This will enhance the rooting process.


  1. Cover the pot with the cutting in a plastic bag: Once the cutting is planted in a soilless potting mix, cover the pot with a plastic bag so that the moisture will be retained for a longer period of time and the heat will also be held in. These conditions will help in rooting.

  1. Once the plant has rooted and given out some new leaves, you can place the pot in direct sunlight. 


Thursday, June 17, 2021

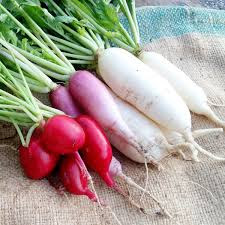
How to grow radish like a pro?

Radishes are one of the most liked vegetables because of their crunchy texture and spicy flavour. 

Radishes are one of the easiest vegetables to grow. Although they are very easy to grow, we encounter some common problems while growing radishes. In this section, we will see about growing radishes right from the seeds and the various tips to grow radish like a gardening pro. In addition, we will also see about the companion plants that can be grown along with radish in our home garden. 

Growing radish in home garden


The first thing that we will see is how to start radish plants from seeds. 

* Soil for growing radishes must be loose and adding compost, dried leaves and grass will improve soil fertility. The soil must also be consistently moist for the good growth of roots. Drought or dry conditions will make the growth of radish tough due to soil crusting and will also alter the flavour. 
* The seeds must be spaced half-inch deep and one inch apart. 
* Optimal growth of radish requires full sun and light shade is toleratable at times. 
* Radish mature quickly and will be ready to harvest within 4 to 5 weeks. 

Let's see few tips for better growth of radish:

1. Practice succession planting by sowing radish seeds every 7 to 10 days, for continual harvest. 
2. When the soil becomes crusty, break it and loosen it by adding some water. 
3. Several radish varieties can be planted together for enhanced growth of radishes. 
4. A tip to know the maturity of the radish roots is to look out for the bulged tops that push themselves out of the soil as they near maturity.
5. For radishes with their best taste and flavor, harvest them immediately after they mature, because the longer they stay in the ground, the hotter they become. 

Moving onto the next segment, which is fertilizing radishes.

Before you plant the seeds, fertilize the top 2 to 4 inches of the soil with all purpose fertilizer and sow the seeds half an inch deep. 

If you would like to avoid commerical fertilizer add some compost on the top layer. 

The initial fertilizer application is enough for the growth is radishes, but if you would like to enhance the growth, you can go for an addition of nitrogen rich fertilizer in the quantity of 1/4 cup for every ten foot. If you are one who loves to consume the radish foliage also, then this fertilizing option is for you. 

Now, the most important, point is companion planting for radish.

The first factor to consider for companion planting is the time of maturity of the plants. 

Radish is a rapidly maturing plant and so, we can consider co-planting radish with other plants that take up a slower maturity time. For instance, peas, leaf lettuces, tomatoes and peppers, are plants that take more time to mature and so can be grown along with radish. 

The second factor is the co-planting of plants that can benefit from radish. 

Radishes will greatly help to repel cucumber beetles and hence planting cucumber along with radish will increase the yield of both the plants. 

The third factor is planting of plants that will help radish plants. 

Strong smelling herbs such as nasturtium and plants such as onions are excellent companions for radish plants. 

Some plants that should not be planted along with radish are broccoli and hyssop. 

Last tip is that, radishes can also be planted together with flowers and herbs, along the borders of the garden or gardening beds as the rich foliage gives an attractive look along with flowers. 


Monday, June 14, 2021

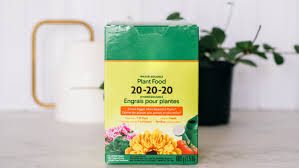
20-20-20 balanced fertilizer - Do's and Don'ts - Every gardener must know this.

When it comes to gardening growing a healthy plant is the goal for every gardener. As a result we tend to look out for various fertilizing options. With immense varieties in the market, we are generally left confused as to which one to use. Be it natural or synthetic fertilizer, choosing the right fertilizer with all the essential macronutrients in the right amount is highly essential for healthy plant growth. 

10-10-10 NPK balanced fertilizer

As we are aware, NPK - Nitrogen, Potassium and Phosphorous are the three most important macronutrients for healthy plant growth. 

Just to recap, nitrogen is that which is essential for green, lush foliage development. 

Phosphorous for flower and fruit production. It also induces healthy root growth. 

Potassium helps in cell development in plants which inturn helps for stress tolerant plant development. 

Now, we will see what is actually a balanced fertilizer: 
A balanced fertilizer is one with equal proportions of all the three macronutrients (NPK). For example 10-10-10. This is the number you see on the fertilizer bag. When you see such identical numbers it means that it is a balanced fertilizer. 

Though this may sound great as a fertilizer to plants, each plant requires different nutrients in various ratios. Not all the plants require equal amount of nutrients in the same quantity.

So, altering the ratio based on the kind of the plant is highly essential for good growth of plants. 

When you add balanced fertilizers on a regular basis, the excess nutrients will harm the plants. 

Now, as we know that balanced fertilizer is not the right option for plants in your garden, what next?

We need to choose the ratio of NPK fertilizer depending on the plant type. 

For example, if you are looking to fertilize plants inorder to produce more fruits, then you need to choose a formula with higher middle number inorder to promote more flowers and fruits. Say, for tomato plants you can either choose 5-10-5 formula of NPK or 10-20-10.
When it comes to plants that are grown for its lush green foliage, such as lettuce, it is advisable to go for higher first number formula. Example, 10-5-5. This is because more nitrogen will promote more foliage. 

Whereas, during the end of season inorder to prepare plants for the winter stress, you can go for higher last number formula of NPK, where Potassium (K) is more. This will slow down the growth of new tender leaves, which will otherwise be affected by harsh weather conditions and inturn promotes healthy cell structure development. These will help the plant to tolerate the winter stress. In this case you can use 3-10-20.

In case if you would like to use a balanced fertilizer such as 10-10-10 or 20-20-20 formula, do this once a year and water the plants adequately after fertilizing it with a balanced formula, so that the excess macronutrient can diffuse into the soil. 

Finally, always try to figure out the need of the plant and then choose the proportion of NPK fertilizer as per the need of your plants and the soil. 


Thursday, June 10, 2021

A must know gardening tip - All about using hydrogen peroxide for plants and gardening.


Hydrogen peroxide is common in our first aid kit. But, how many of us are aware that hydrogen peroxide is also common in gardening. Hydrogen peroxide provides immense benefits for plants. We will discuss in detail about how hydrogen peroxide benefits plants, how much hydrogen peroxide is safe for plants,  how to use hydrogen peroxide for plants and many more details.

Hydrogen peroxide for plants


Now, let's see what are the benefits of hydrogen peroxide to plants.


Hydrogen peroxide is very effective in maintaining a healthy root system.It treats root rots.

Apart from this it is used for
1. Hydrogen peroxide actually releases oxygen and provides additional oxygen supply to roots, thus promoting vigorous growth of plants.
2. Pest control
3. As a foliar spray that prevents fungus
4. Pretreating seeds
5. Treating soil fungus
6. Accelerate germination: Soaking the seeds in a weak solution of hydrogen peroxide will enhance sprouting rate immensely.

With so many benefits to plants what is that which exactly makes hydrogen peroxide beneficial to plants?


Similar to water, hydrogen peroxide is also made up of the same atoms of hydrogen and oxygen, except that hydrogen peroxide has one additional atom of oxygen and this is what gives it the beneficial properties.

We might also wonder, if hydrogen peroxide is harmful to plants?


After looking into the make up of hydrogen peroxide, which is very similar to water, hydrogen peroxide is definitely not harmful to plants, provided it is used in diluted quantities. Generaly 3% solution of hydrogen peroxide is the one which is commonly available in stores. They can also go upto 35%. When it comes to gardening purposes, 3% hydrogen peroxide (H2O2) is safe for plants.

The next common question is that, how much hydrogen peroxide should I use for the plants?


To give your plants a good boost of oxygen and to control the pests, dilute 5ml of 3% solution of hydrogen peroxide in 240 ml of water and spray it on the plants. If you want to treat plants with root rot or fungal infections, dilute 15 ml of hydrogen peroxide in 240 ml of water.

If you want to use hydrogen peroxide for a larger area of your garden, then consider using 35% hydrogen peroxide solution and dilute 1 part in 10 parts of water.

Once we know the amount to be used we also have the question, how often should hydrogen peroxide be used for the plants?
We can water the plants with hydrogen peroxide solution once a week and we can also use hydrogen peroxide after it rains.

Monday, June 7, 2021

Rarely known 6 highly effective organic weed control for your summer garden.

Most of the times we tend to pull out the seedlings that grow along with the weeds. This is what I did to my little lettuces that was growing inbetween my onions. We either tend to do this either by mistake or our weeder equipment just pulls out the veggie seedlings as it weeds.

But this information that I am going to share here is what I knew only later, after causing much humiliation to my veggie seedlings in the summer garden. 

Remember these important factors in organic weed control: 

Organic weed control


1. Critical period of harm: Weeds cause harm to your plants only during the critical period, which is 6 to 8 weeks after sowing or transplanting the veggies. It is only this period of competition by the weeds that causes great harm to the yield. Weeds that grow after this period do not affect your plants but, we must be watchful to prevent the formation of seeds. 

Protip: The weeds that you weed out can also be used back in your garden to increase yield of your vegetable plants. Know how.  

2. Sensitivity to root disturbance: This is another major factor that needs to tbe considered while weeding. If your weeding session causes intense harm to your black peas and beans then they might never recover. Also a slight mangling of vines to the cucumber family may cause great harm to the plants. It will prevent the plants from proper ripening. 

Related article: Highly effective homemade fertilizer for your vegetable plants

3. Plants with their own organic weed control system: The vigorous vining of canopy tend to cause a dense canopy effect to the weeds by shading them and thus turns out to be an effective self weed prevention system. Similarly, the dense green ground cover of the stems of sweet potatoes also tend to form their own weed control. 

Know this: Do you notice these common signs in your plant - Be alert.

You can use such plants strategically in your summer garden to prevent weeds organically. For instance, growing canopy forming crops like squash as a weed suppresser in the bed will also help the plants in the adjoining row by extending it's weed control system to the adjoining rows. These canopy forming plants will also help to retain soil moisture.   

Related article: 5 must know gardening idea and gardening hacks

4. Growing leafy greens as weed controller: Leafy green veggies or herbs such as mustard can be grown in between onions and other veggies. These will shade out the weeds that are growing and will prevent them from flourishing in the critical period. Mustard greens tend to grow out as a natural mulch that is great and great to prevent weeds. In addition to shading out weeds, it enhances the soil greatly and reduces soil borne diseases. 

Related article: Homemade fertilizer rich in Nitrogen and Potassium. 

5. Consider nurse crops: Nurse crops are short term crops that can be grown in the summer gap. These will keep your bed or soil engaged during the summer gap and provide organic weed control until you need the space back for your veggie seedlings. Buckwheat and peas can be excellent nurse crops. Once you want to clear the space for seedlings, just pull out these and use them as mulch on your bed. 

Related article: Want to grow huge amounts of potatoes successfully in containers at home - know this. 

6. Use enhanced mulch system: Using news papers as mulch on the soil or your raised bed is a good option as it tends to keep the weeds out much effectively. You can lay a thick layer of newspaper around the plants and then cover it with a layer of common mulch that you use such as, sawdust, grass clippings, wood chips etc. 

Tomato plants with lots of flowers but no fruits - Gardening Tips to grow tomatoes.

When it comes to growing tomatoes successfully, one major problem that we face is a good plant with lots of lush foliage, and flowers, but no fruits. There are various factors that affect the fruiting of your plants and these include temperature, soil, poor growing conditions and improper watering. 

Read till the end to get a good insight on the various factors that lead to poor fruit production in your tomato plant. 


Lots of flowers, but no fruits in the tomato plant.


If you have a good foliage along with a lot of flowers in your plant, but no tomato formation, then this might be due to the following 3 reasons.


  1. Lack or insufficient pollination: Poor pollination is one of the common  factors that cause improper fruiting in tomato plants. To improve pollination, in places where you can attract natural pollinators, try using artificial ways of pollination. Here are a few examples of artificial pollination methods.

  • Try using an electric toothbrush to generate a good vibration that induces pollination. 


  • Electric brush pollination for tomato plants

  • Use pollination spray to produce fruits. These pollination sprays also known as blossom hormone sprays induce fruit production even in flowers that are not pollinated. These fruits will have the same taste and appearance, but will not have seeds. 

  1. Wrong type of fertilizer: Potassium is one of the major factors required for good production of tomatoes. Feeding your plants with insufficient fertilizer of the wrong type of fertilizer will decrease or cease productivity. To keep your tomato plants well fed you can also make your own fertilizer. 

  2. Fungal diseases: Botrytis which is a common fungal disease affecting tomato plants will also cause the flowers to drop and hence there will be lack of fruit production. 


No tomatoes on plants with lush foliage. 

A good green foliage on the plants is a sign of a healthy plant, but no tomatoes on it may be due to 3 main reasons.

  1. Insufficient direct sun: Direct sunlight for around 6 to 8 hours is highly essential for tomato plants to bear lots of tomatoes. If your plant is in a location that does not satisfy this need of the plant, shift it to an appropriate location immediately. It will take a few days for the plant to adapt to the new conditions and begin fruiting. 

  2. Improper watering: Water is the next important factor for successful tomato production. Improper and inconsistent watering will lead to flower drops and thus no production of tomatoes. Tomato plants love a lot of water and so watering them adequately will help increase yield. 

  3. Choosing the wrong variety:  There are certain varieties of tomato plants that grow well in certain climates. For example in an extremely hot climate of above 30 degree celsius during the day, choosing a heat-tolerant variety of tomato is highly recommended. This is because intense heat can prevent the plants from producing tomatoes, by making the plants drop flowers or in certain cases there will be no flower production itself. 


Caring for your tomato plants is also highly essential to produce good yield. Know these rare tips that can help you produce greater yield from your tomato plants. 


Related Posts